在centos7中如何为php7安装redis扩展

本篇文章给大家介绍一下在centos7中为php7安装redis扩展的方法。有一定的参考价值,有需要的朋友可以参考一下,希望对大家有所帮助。

下载redis
下载redis,解压,编译:
$ wget http://download.redis.io/releases/redis-4.0.6.tar.gz
$ tar xzf redis-4.0.6.tar.gz
$ cd redis-4.0.6
$ make && make PREFIX=/usr/local/redis install  #安装到指定目录
现在去刚刚tar包解压出来的源码目录中,拷贝一个redis.conf配置文件,放到/usr/local/redis/bin/目录下
进入到redis目录下,运行vi redis.conf
将daemonize no改为 daemonize yes保存退出
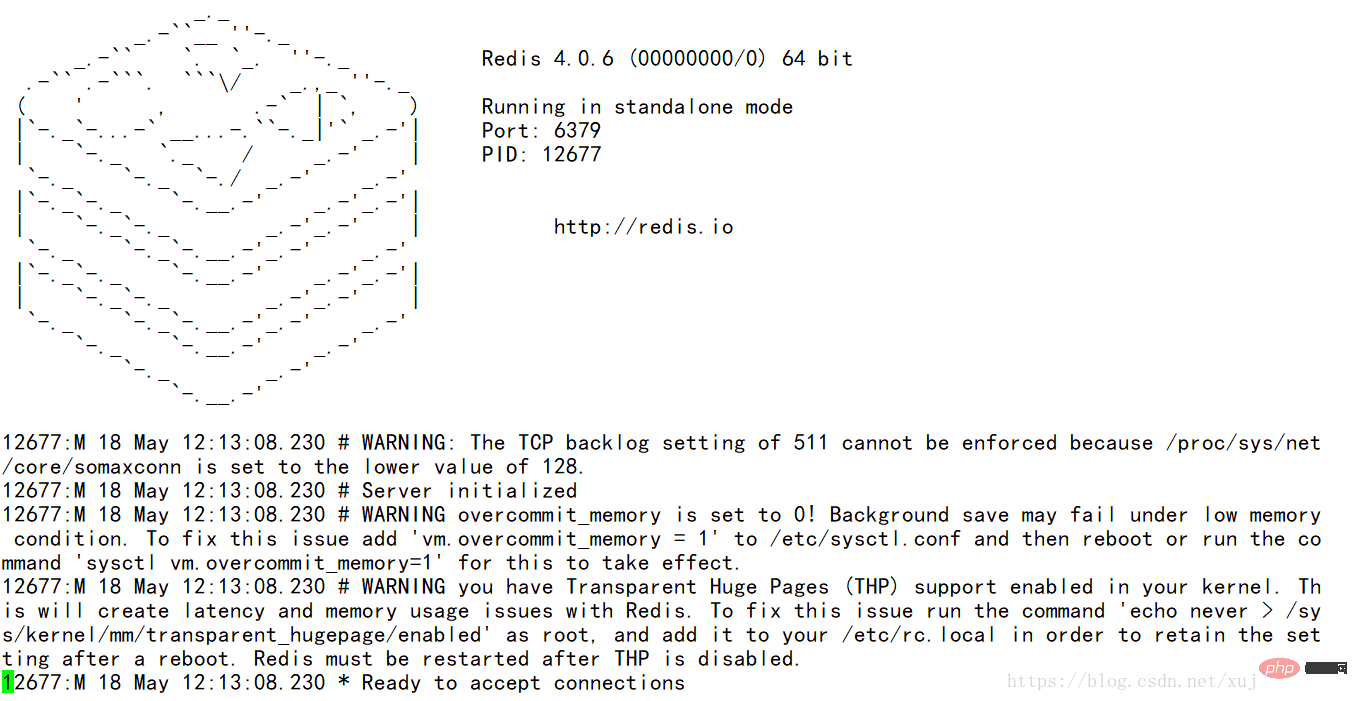
通过下面的命令启动Redis服务:
./bin/redis-server ./redis.conf
你可以使用内置的客户端命令redis-cli进行使用:
$ ./redis-cli
redis> set foo bar
OK
redis> get foo"bar"
以上呢是安装redis程序
在php7中要开启redis扩展
使用git clone下载git上的phpredis扩展包
[root@localhost local ]#git clone https://github.com/phpredis/phpredis.git
到了这一步,我们要使用安装php时生成的phpize来生成configure配置文件,
//具体用哪个要取决于你的phpize文件所在的目录,这时你应该用 whereis phpize 来查看路径
[root@localhost local ]# whereis phpize
phpize: /usr/bin/phpize /usr/share/man/man1/phpize.1.gz
这里表明路径为/usr/bin/phpize,然后执行:
[root@localhost phpredis ]# /usr/bin/phpize
Can't find PHP headers in /usr/include/php
The php-devel package is required for use of this command.
这里报错了,原因是没有安装好php-devel,由于我是使用的php7.0所以执行以下命令:
[root@localhost phpredis]#yum -y install php70w-devel
然后再次执行:
[root@localhost phpredis]# /usr/bin/phpize
Configuring for:
PHP Api Version: 20151012
Zend Module Api No: 20151012
Zend Extension Api No: 320151012
执行完上一步,我们就有了 configure 配置文件了,接下来配置
[root@localhost phpredis]#./configure
或者执行
[root@localhost phpredis]#./configure --with-php-config=/usr/bin/php-config
接下来是编译安装
[root@localhost phpredis]#make
[root@localhost phpredis]# make install
 Installing shared extensions:      /usr/local/php/lib/php/extensions/no-debug-non-zts-20170718/
配置php的配置文件php.ini(具体放在那里可以用 whereis php.ini 来查看),我的配置文件php.ini在/etc/下
[root@localhost phpredis]#vim /etc/php.ini
开启redis扩展:
extension = redis.so
redis.so文件的路径可以在make install的时候看到
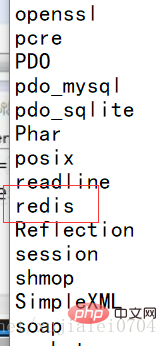
[root@localhost local]# php -m #查询php的扩展
重启nginx服务器,重启php-fpm,使配置生效
重启之后我们打开info.php,已经可以看到redis的扩展信息了

本文由白琉璃于2022-05-29发表在白琉璃源码网,如有侵权或疑问,请联系我们,谢谢。
本文链接:http://www.bailiuli.com/t/3300.html


")


发表评论